
Im guilty of not filtering the column lines due to the time it takes to do this. This is a Easy, Simple, and Clean way of doing it. BOOM Free Money. Even better, the Scope Box has a 3D element to it, exactly like a Section Box in 3D views. Therefore you can apply the column line filtering over as many levels as you choose.
Enter Scope Box. Yes Friends. The Scope Box does have a purpose. Took a 3 day introductory Revit course in 2009. I remember scope boxes, but the instructor didn't say this explicitly solved the problem or I just didn't grasp it at that point. Anyway, let's see how it works.

Go to the VIEW Tab, Hit the SCOPE BOX button, you have to draw a box here. Make sure you cut the scope box extents short of the CROP REGION of the plan. It doesn't have anything to do with the matchline. Just make sure the boundaries of the scope box and the crop region do not cross or the column lines will show up.

Now select the Scope Box, in the PROPERTIES box, you can give the scope box a name. In our project, the side we drew our scope box on is Part "B".

Now we will repeat this for Part "A"

Lets go pick all the column lines which do not have a column in Part "B". In the PROPERTIES Box, Assign them to Part "A" for the scope box.
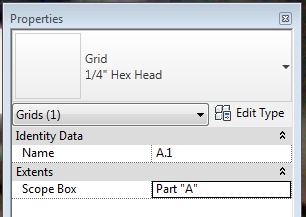
Column line A.1 Should not show up on my Part "B" Sheet or Plan. You may have to adjust the crop region and the Scope Box sizes to get it to work correctly. And we're out.
 |
| Killer. No A.1 Column Line |
No comments:
Post a Comment